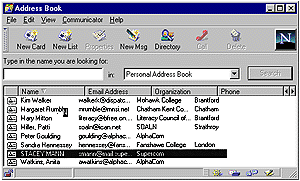
Controlling the Display of Your ContactsTake a look at Figure 3-3. You will note that there are five headings across the top of the contact list area - Name, Email Address, Organization, City and Nickname. The order of these headings can be changed quite easily. Using the mow click and hold the left mouse button on the heading that you wish to move. Drag the heading to the new location and release the button. The headings will be reorganized.But what if I don't want all five headings displayed? For example,
imagine that I do not need the column for Nickname. Take note of the
small, black arrow to the right of the Nickname heading. If you click
on this arrow, the nickname heading is You will see that several of the listings appear to be followed by three dots. This is to indicate that there is more to the listing than can be displayed. This is usually because the column is too narrow to display all of the characters. To view all of the name or listing, point at the information with the mouse and a small yellow text box will be displayed with the complete text. 
You may not want the list to be sorted by name. You may have a need to have the list sorted by the organization or city. Or perhaps there is a need to have the list sorted alphabetically from Z to A, rather than A to Z. The manner in which the list is sorted can be controlled by selecting the View menu and then choosing the appropriate criteria. |