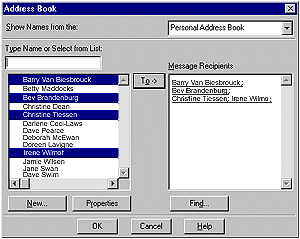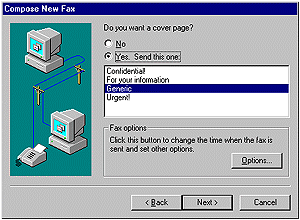
To select names from the Address Book, simply click on the name in the led pane and then click on the To button in the middle of the window. The names will be added to the Message Recipients list. You can repeat this procedure until all the recipients names appear on the right. However, you can move all the necessary names to the Message Recipients list at once. Select the first recipient from the list on the left. Hold down the Ctrl key on your keyboard and continue to select the remainder of the desired names. Click the To button and they will all be moved to the Message Recipients list. Click on OK when you are finished. You will be returned to the Compose New Fax dialog box as in Figure 8-15. You will note that the names that you selected are now in the Recipients list. Click on the Next button. The dialog box that will be displayed (Figure 8-16b) will give you the option of sending a cover page or not. If you choose to use a cover page, you can select which one from the list. If you wish to change some of the options such as when your fax will be sent, click the Options button. You will be returned to a dialog box similar to Figure 8-2. When finished, click on the Next button. 
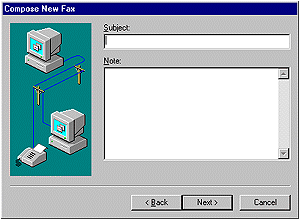
The dialog box as shown in Figure 8-17 will appear. Enter a subject for your Fax and enter the short note that you wish to include. Click the Next button when you are finished. You will then be asked if you wish to include one or more files with your message. This feature can be used to attach files to your fax similar to that of attaching a file to E-mail. If you click the Add File button, you will be taken to a typical Windows 95 navigation window. Find the file that you wish to attach and click Open. The dialog box will now show the path of the file that is to be attached. When you are finished, click the Next button. Click on the Finish button and Microsoft Fax will send your message. 
|