|
Print Mailing Labels
- Open a new document under
Microsoft Word.
- Click Tools on the Menu
bar. Choose Mail Merge. Click the Create button.
- Choose Mailing Labels to
create a main document.
- Click the Active Window
button.
- Click the Get Data
button. Choose Open Data Source.
- An Open Data Source dialogue
box appears.
- In the Look In box click
the drop-down arrow.
- Choose 3 ½ Floppy
(A:).
- Select the file
MailingList.
- Click the Open
button.
- Click the Set Up Main
Document button.
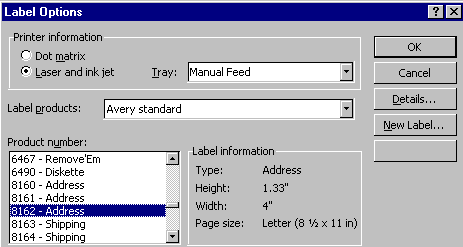
- The Label Options
dialogue box appears.
- In the Label products
field click the drop-down arrow. Choose a product name. (Check your package of
labels for a product name.) In this exercise choose Avery
standard.
- From the Product number
field choose an option. (Check your package of labels for a product number.) In
this exercise choose 8162 – Address.
- Click the OK
button.
- Click the Insert Merge
Field button.
- Click
FirstName.
- Press the space bar on your
keyboard once.
- Click the Insert Merge
Field button.
- Click
LastName.
- Press the Enter on your
keyboard once.
- Insert the remaining
fields.
- Once all the fields are
inserted your screen should look something like this:
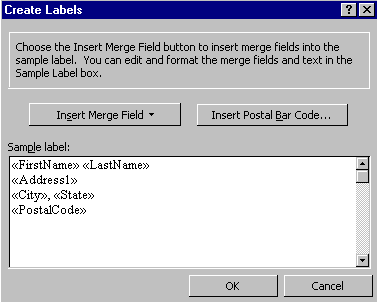
- Click the OK
button.
- Click the Merge
button.

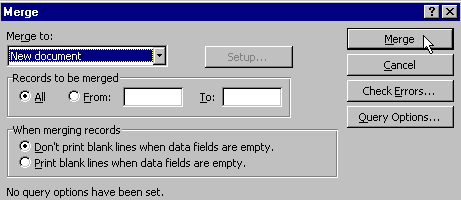
- Load the label sheet into your
printer. To print the labels click the Print button on the
toolbar.
- Close all the
files.
|